3. Testing
Modify the WebPart class
- Navigate to the folder
src\webparts\tailwindDemo, openTailwindDemoWebPart.ts
Replace the stylesheet
- Remove the styles import
import styles from './TailwindDemoWebPart.module.scss'; - Add the import to the
main.cssfile
import '../../../assets/dist/main.css'; - Remove the file
TailwindDemoWebPart.module.scss
Display some content
Replace the content in the render() method to show something.
Note: Depending on the framework, your render method could work differently.
If you are using React or SolidJS, you can use the classes in your components.
The important piece is setting the element ID, to enable Tailwind.
Your final WebPart class should look like this:
import { Version } from '@microsoft/sp-core-library';
import { BaseClientSideWebPart } from '@microsoft/sp-webpart-base';
import '../../../assets/dist/main.css';
export interface ITailwindDemoWebPartProps {
}
export default class TailwindDemoWebPart extends BaseClientSideWebPart<ITailwindDemoWebPartProps> {
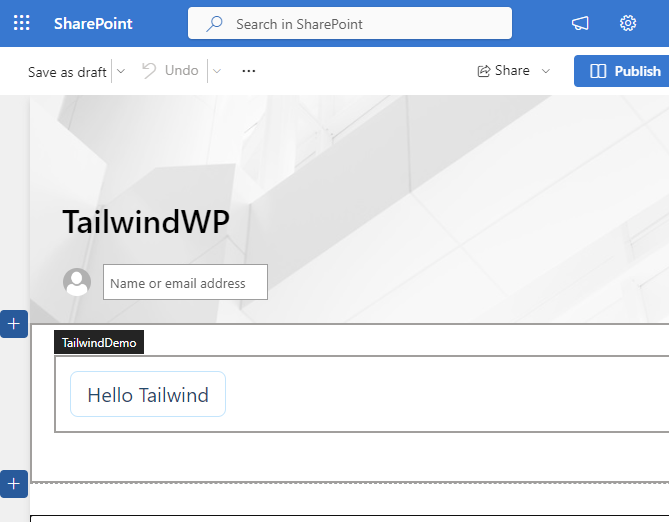
public render(): void {
this.domElement.id = "tw";
this.domElement.innerHTML = `
<div class="inline-block px-4 py-2 text-xl text-sky-900 border border-sky-200 rounded-lg">
Hello Tailwind
</div>`;
}
...
}Test with SharePoint
-
Start the dev server and add the webpart to a dev page.
-
If you need more information, follow this guide.